| This page is for demonstrating adding a PLC to your machine if there is not one installed. This is the best thing to do so you do not have to interact with the machines PLC or you don't have the software to see into the machines PLC. |
| |
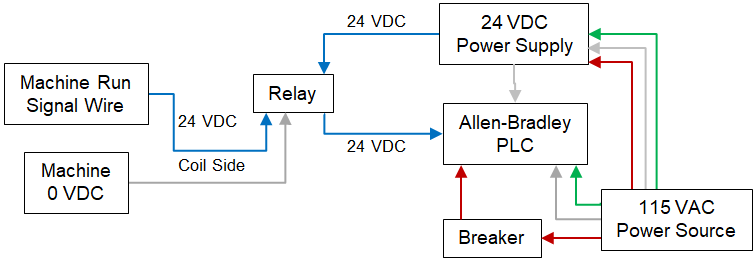
| Find a connection that energizes when the machine gets a run signal. Typically, machines have a signal wire to tell Frequency Drives to run or a relay that is designated to support machine addons. |
| |
 |
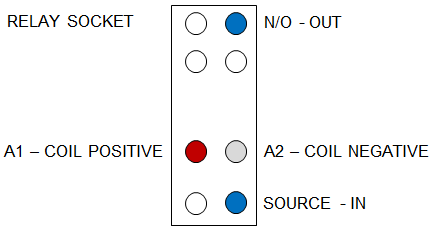
After you setup your hardware, you can test the function by running 2 wires (24 VDC to A1 and 0 VDC to A2) from the power supply to the relay. IP Address is not required for this testing function.
Attach the 0 VDC wire to the A2 terminal and holding the 24 VDC wire in your hand, touch the A1 terminal. If you hear the relay click and you see the input on, you have successfully setup your hardware. |
| |
| Add a relay between your PLC and the machine using the machines power to energize the relay coil. Relay choice must match the coil side of the relay. |
|
| |
 |
| |
| Add a 24 Volt DC power supply for the 24 volt circuit. Does not have to be a large power supply. It is only used to provide a signal to the PLC input. |
| Power Supply |
| |
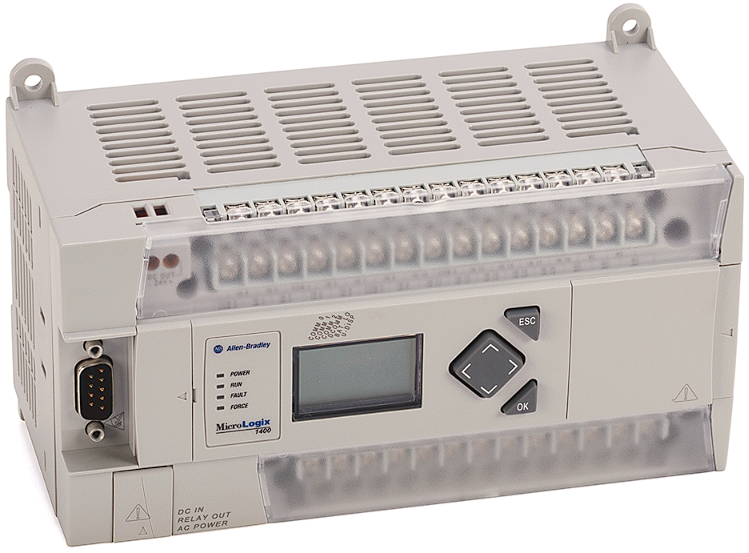
| Allen-Bradley PLC (Micrologix 1100, 1200, 1400) PLC must have ethernet support. |
 |
| |
| Set the IP Address for your PLC. The example I am using is for a Micrologix 1400. |
| |
| Press ESC |
| Arrow down to "Advanced Set" |
| Press OK |
| Arrow down to "ENET Cfg" |
| Press OK |
| Arrow down to "IP Address" |
| Press OK |
| Arrow down "ENET Mode" from "bootp" to "stati" |
| Press OK |
| Set IP Address - Arrow right and left to select the number - Arrow up and down to change the number. |
| Press OK |
| Press ESC until you see "I/O Status" |
| Press OK |
| You are done. |
| |